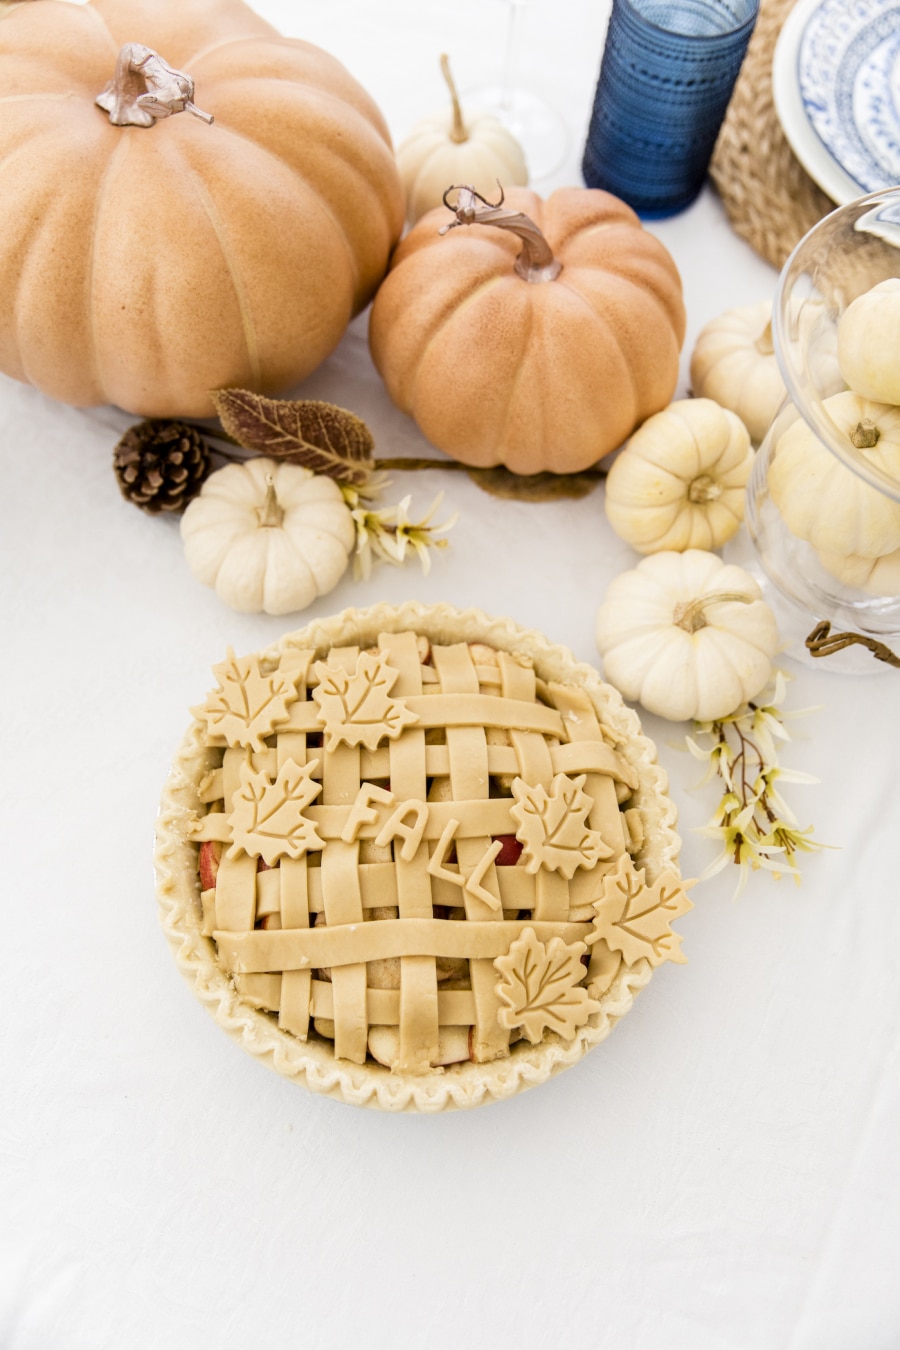
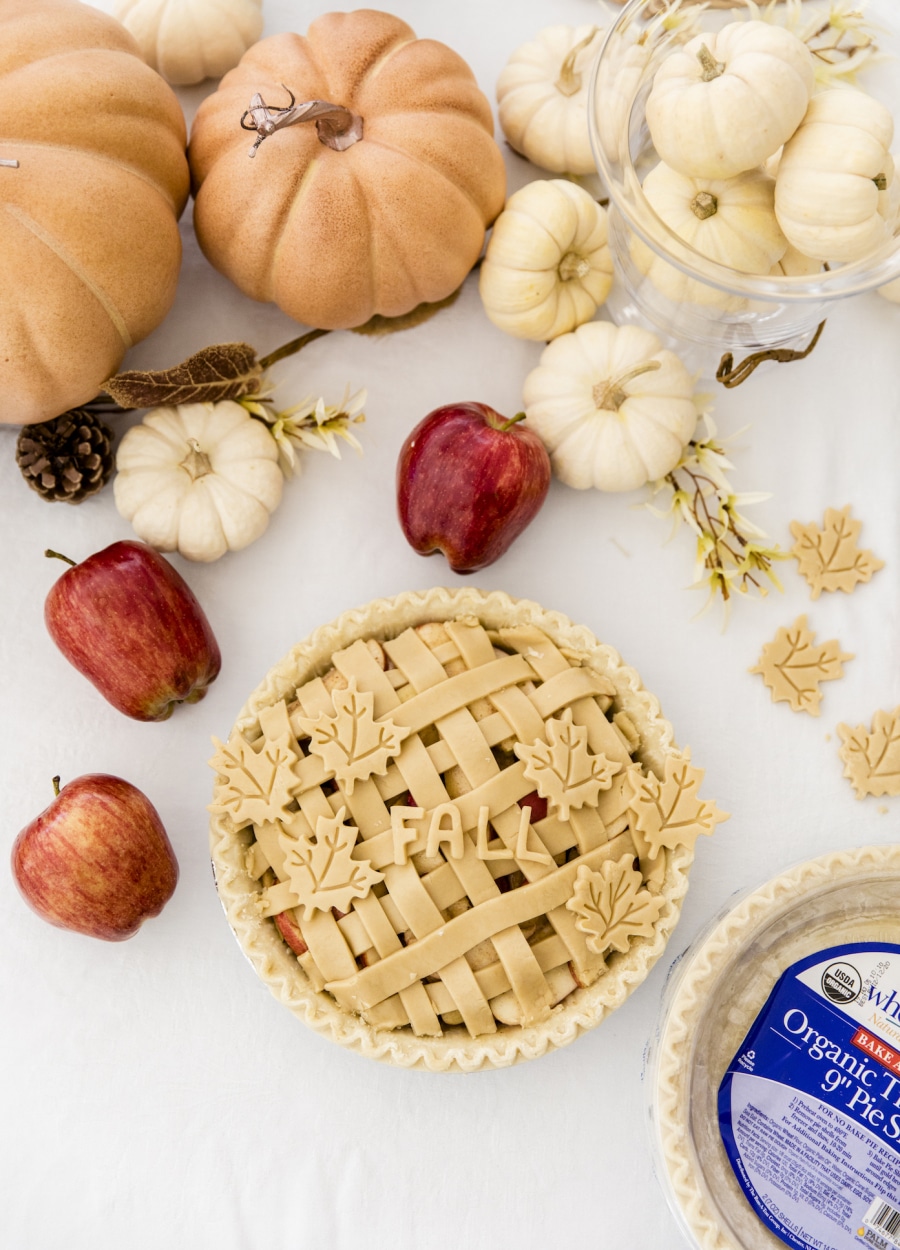
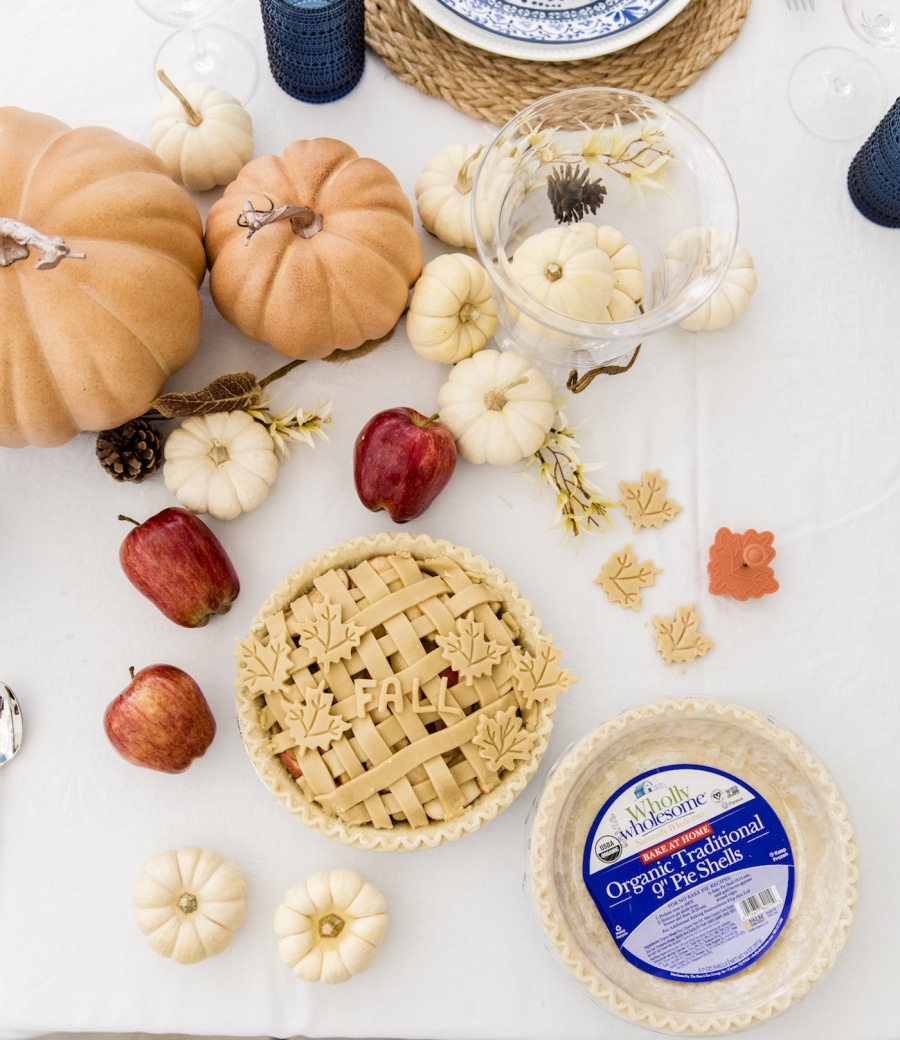
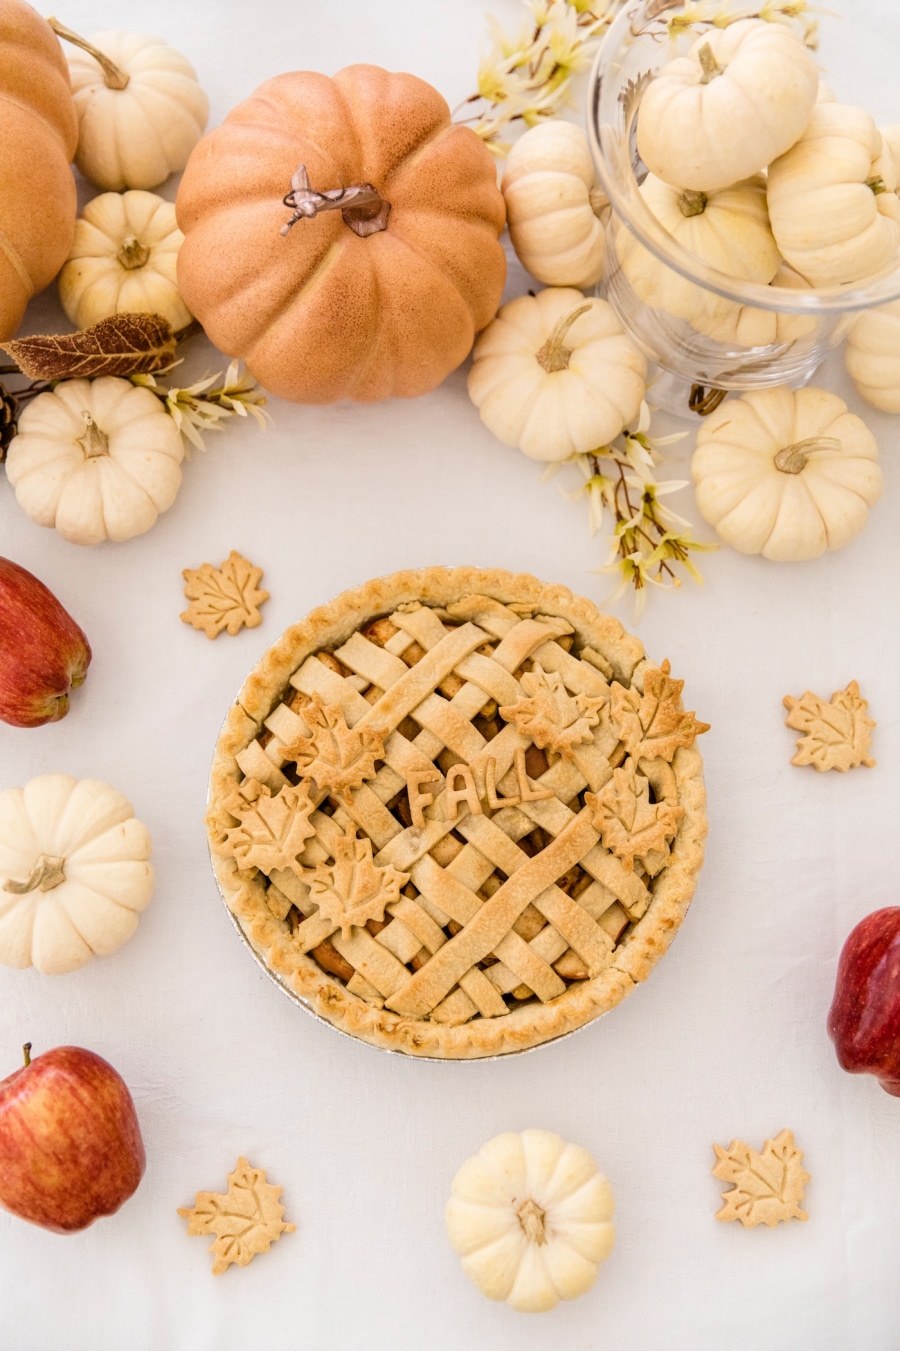
The cutest Pie I ever did see
Making pies is a Fall family tradition. And while I pretty much always make the same two pies, blueberry or apple; I do try to “style” the top of my pies with a fresh twist each year!
Last year I decorated my pies with a crust of beautiful Fall leaves (see the post here). I bought these very well-priced and good quality cookie cutters in the shape of Maple, Oak, double leaves, and basic leaves, so I used them again this year (here is the link to purchase)!
Then you may remember over Valentines’ Day I found mini Alphabet cookie cutters that I used to shape fruit into my kid’s names (see the post here so you have a visual). Those were so cute, I decided to use the adorable cutters to write the word Fall on this year’s pie. (Shop the Alphabet cookie cutters here – again something I have had a year now and use a ton!).
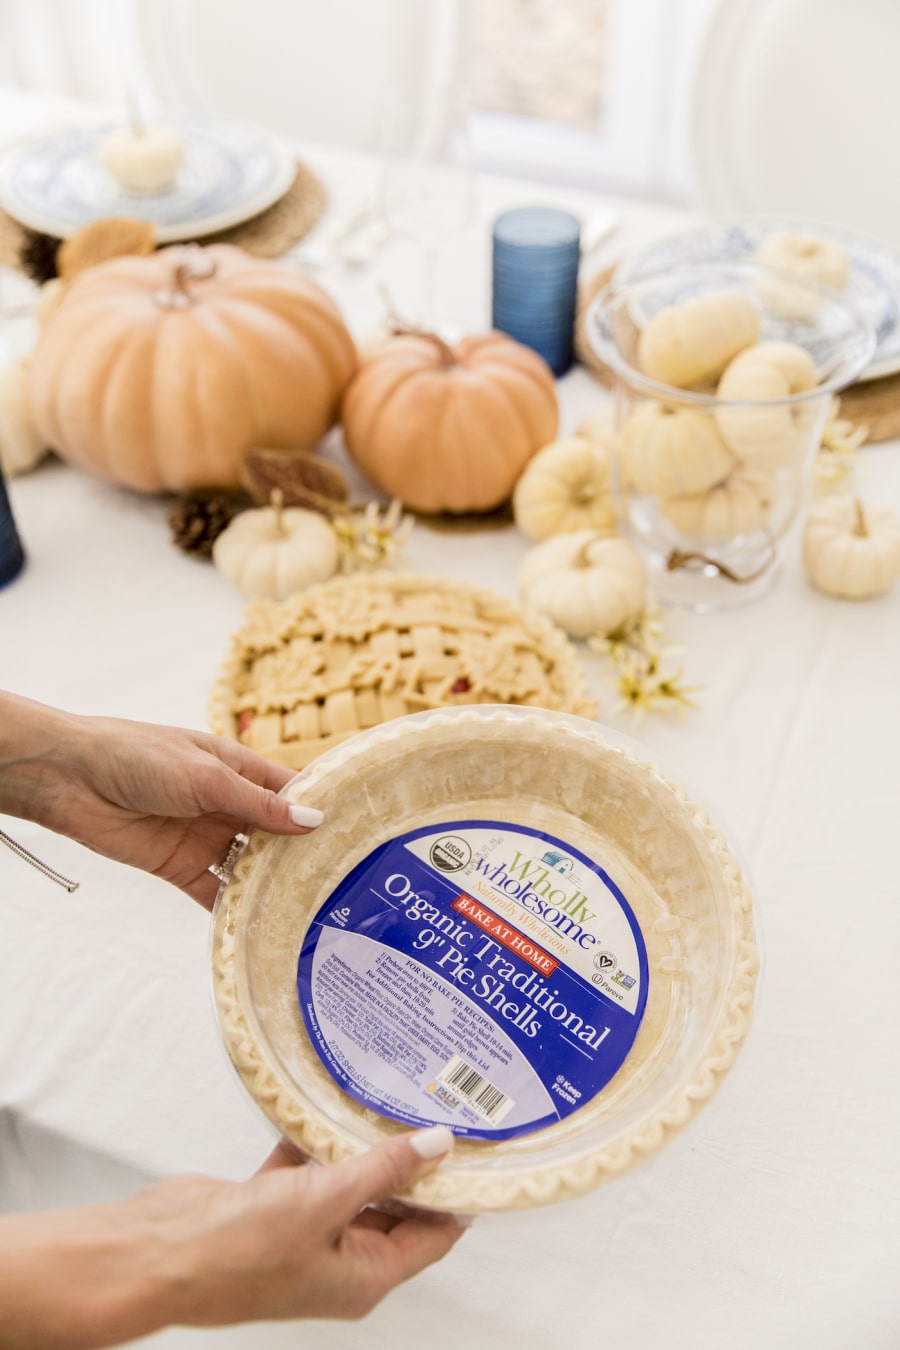
I will tell you I was super skeptical that the letters would NOT bake well, but I was super impressed with how well they came out (see the finished product at the end of the post!!). I think one of the tricks is the quality of crust you choose (I am a pre-made kind of gal!) and this year I chose Organic 9″ Pie Shells from Wholly Wholesome. I used one packet for the bottom of my pie (which comes with a beautiful ridge – woohoo less work!!), and a second to make the top of my pie and little cut outs!!
Find the recipe for my pie apple pie below. Now that Halloween is over, let the Thanksgiving baking and prep begin!!
Apple Pie Recipe
Ingredients:
- 6 cups thinly sliced, peeled apples (6 medium)
- 3/4 cup sugar
- 2 tablespoons all-purpose flour
- 3/4 teaspoon ground cinnamon
- 1/4 teaspoon salt
- 1/8 teaspoon ground nutmeg
- 1 tablespoon lemon juice
- 2 – 9″ Traditional Organic Pie Shell by Wholly Wholesome
- Leaf cookie cutters here
- Alphabet cookie cutters here
Instructions:
- Heat oven to 425°F. Place 1 pie crust in ungreased 9-inch glass pie plate (or leave in the foil it arrives in).
- In large bowl, mix filling ingredients (all ingredients above) and place inside your crust.
- Time to make your “lattice” or woven top. I recommend this website for a step by step instruction on how todo so (SimplyRecipes.com).
- Make your shapes!! Use your Leaf cookie cutters (here) to create leaves and Alphabet cookie cutters (here) to write FALL. Place on top of your woven top.
- Bake 40 to 45 minutes or until apples are tender and crust is golden brown. {Pro Tip: Cover edge of crust with 2- to 3-inch wide strips of foil after first 15 to 20 minutes of baking to prevent excessive browning.}
- Let the pie cool for at least 2 hours before cutting, making it easier to slice!
- Serve!!
Shop the post:

Photography by Yesi of Simply Lively
Thanks to Wholly Wholesome for collaborating on this post.
Shop Fashionable Hostess Favorites